
DIY Wood Tray for a Beach Centerpiece
Make your own wood tray to use for this beach inspired wedding centerpiece! I'll show you how down below.
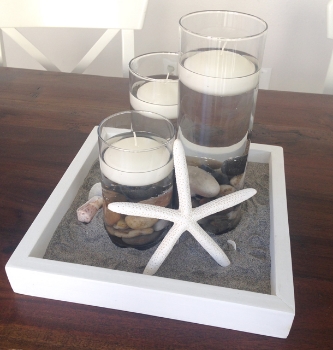
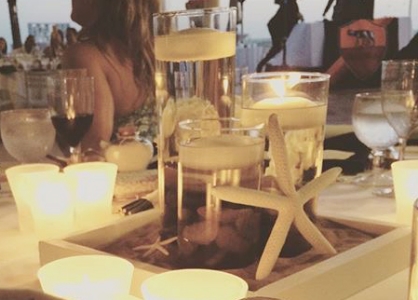
First, let's start with the inspiration photo I received for an upcoming wedding from pinterest.

I love the look of this centerpiece, but didn't realize how hard these trays would be to find! I searched every floral supply store in the area and online, and found a few that were close, but just not quite right. Since I needed them for an upcoming wedding, I thought I would put my DIY skills to use and build them!
Turns out, they are super easy to make and came out looking much better then some of the similar styles I found in the store. So, if you're a floral designer, or DIY bride and in need of a wood tray for your beach inspired wedding centerpiece, keep on reading for the build plan.
How to make a wood tray: (each tray is approximately 12" x 12" x 1 3/4")
Materials Needed for 8 trays (feel free to adjust as needed, each tray uses a 12" square of plywood and about 4' of pine furring strips)

1 - 2' x 4' sheet of 1/4" Birch Plywood
4 - 8' long 1" x 2" Pine Furring Strips
Miter Saw
Circular Saw
Sander & sand paper
Wood Glue
Nail Gun
5/8" brad nails
Measuring tape & pencil
White Chalk Paint
Clear Matte Wax
Paintbrush
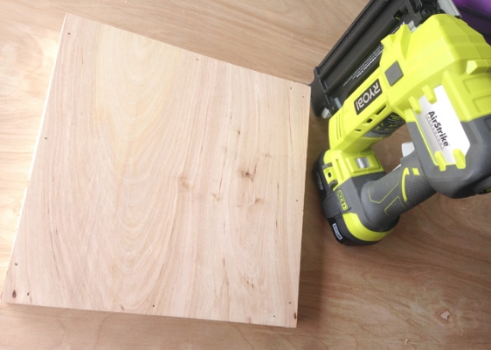
Step 1: Rip your sheet of plywood into 8 squares. I used a circular saw and cut it in half length-wise first, then cut each of those pieces into 4 squares. Home Depot can make these cuts for you too.

Step 2: In order to make the sides of each tray fit perfectly to the plywood squares, it's best to measure and cut them individually. Start by mitering the end of a furring strip at a 45 degree angle. Next, measure one side of the square, then cut the furring strip to match with another 45 degree cut. Continue around the square until you have cut all 4 sides.


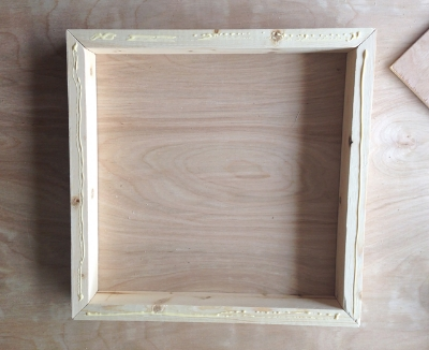
Step 3: Assemble the sides using a nail gun with 5/8" brad nails putting 1 nail into each corner. Once they are all lined up perfectly, add a second nail for extra reinforcement.

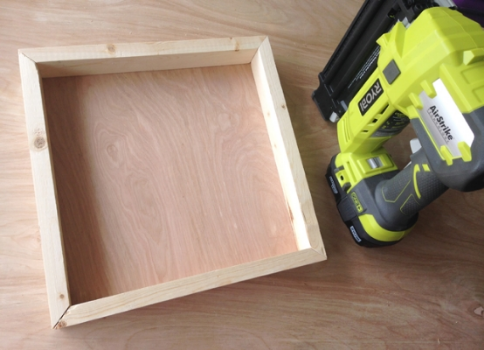
Step 4: To assemble the tray, put a thin layer of wood glue on the bottom of the sides, then attach the plywood square from the bottom with a nail gun and 5/8" brad nails. Start at the corners to make sure they are square and lined up, then finish by adding nails around all sides.
Repeat steps 2-4 for each tray.
Step 5: Sand away until all of the sides are perfectly flush and smooth. I started with 120 grit, then moved to 220 for a smooth finish.

Step 6: Paint with the color or stain of choice. The bride wanted these to be white, so I chose to use white chalk paint since it's easy to use, dries super quick, and sands down for a perfectly smooth finish. I used 2-3 coats on each tray, and was able to get all 8 trays painted with just 1 bottle!
Step 7: Finish with a clear matte wax to help seal in the paint and color.
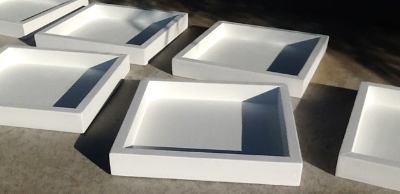
And that's it, so easy! All that's left is to decorate them for your wedding or event! Here's how mine came out.

Hope you enjoyed this DIY and thanks for stopping by!